Let’s talk about chicken. A simple ingredient, yet so versatile. In this guide, we’re diving deep into how to grill chicken breast on the stove.
Whether you’re cooking for yourself, family, or that special someone, mastering this technique will elevate your weeknight meals and impress your guests.

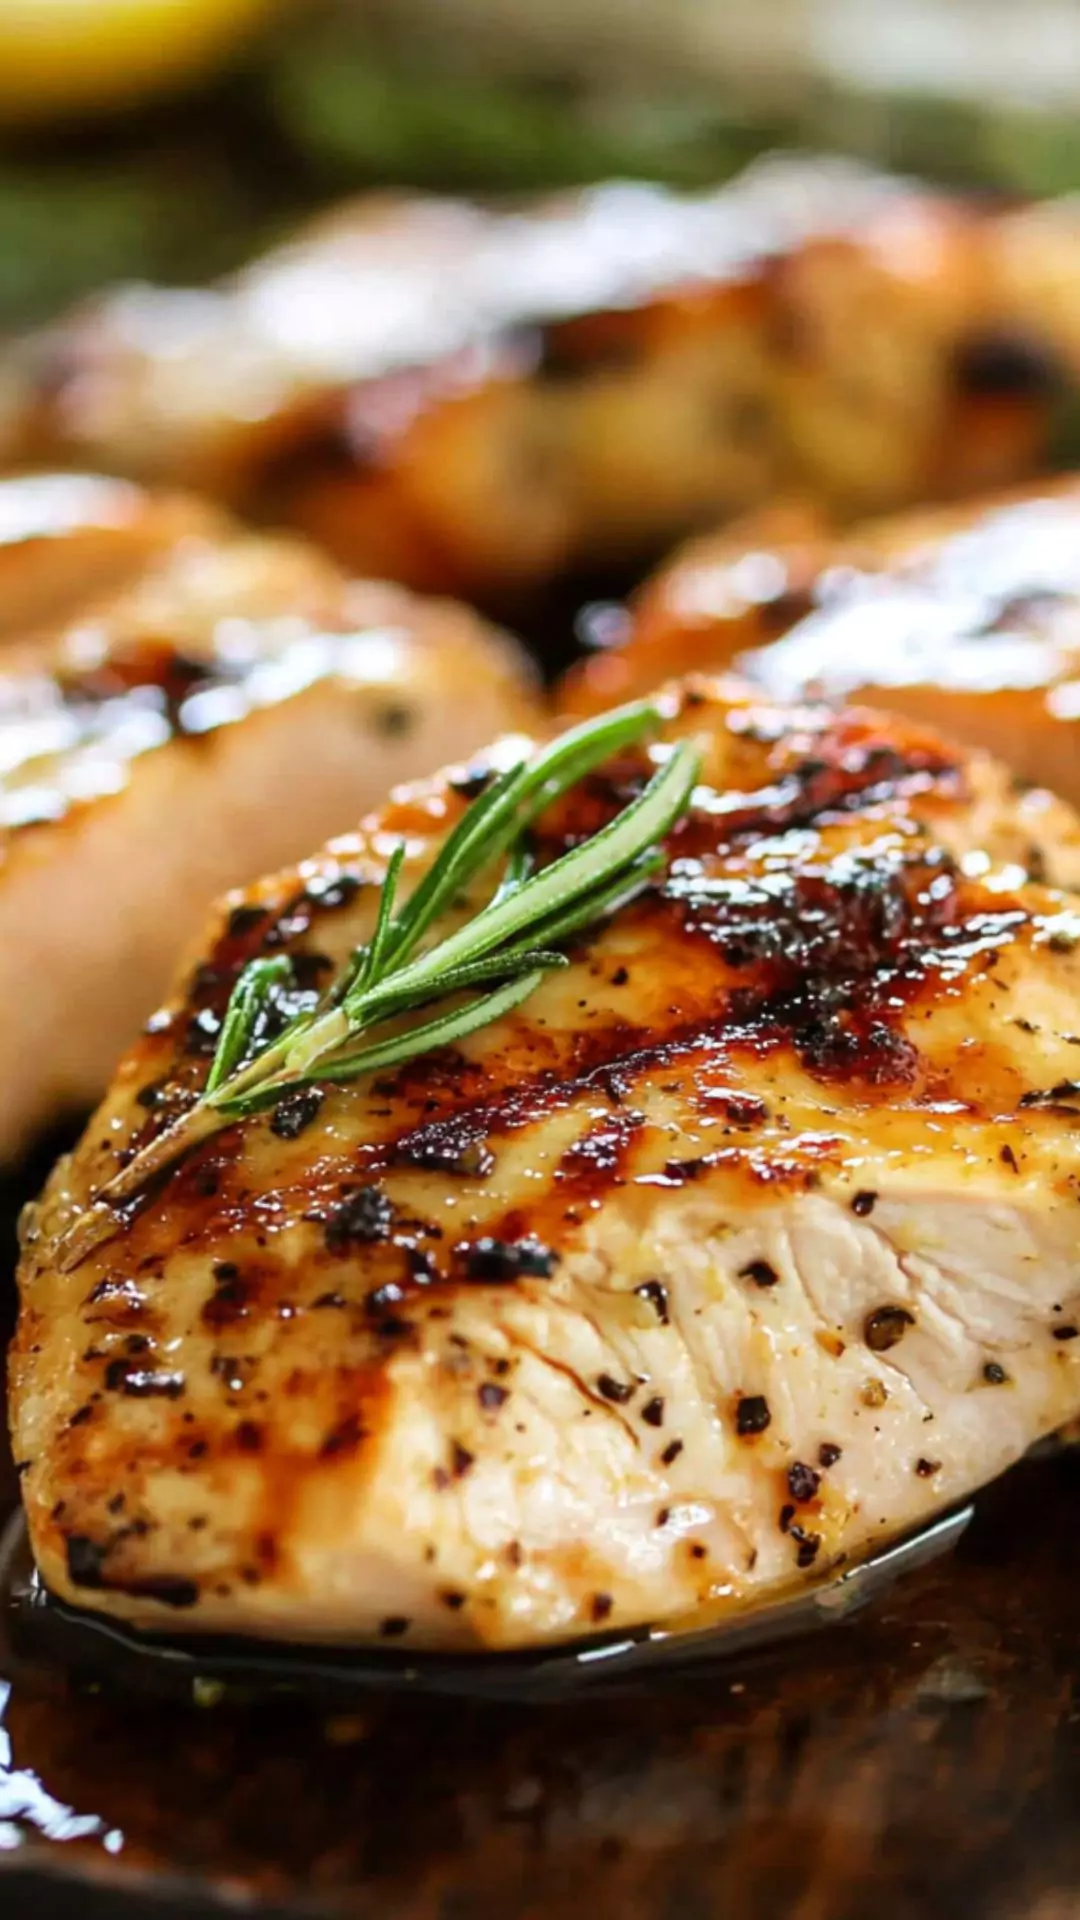
The Lowdown on Grilling Chicken Breast on the Stove
So, what does it mean to grill chicken on the stove? In its simplest terms, it’s about using a pan on your stovetop to achieve inviting, grilled flavors without needing an outdoor grill.
The result is juicier chicken with a nice sear that adds depth to every bite. It’s convenient, especially when you’re feeling lazy about firing up the propane tank—let’s face it, who wants to be a grill master on a rainy day?
You will also like the following Dinner recipes!
- Best Bobby Flay Chicken Enchiladas Recipe
- How to make Bobby Flay Chicken Fingers
- Easy Bobby Flay Pulled Pork Slow Cooker Recipe
Why You’ll Love This Method
You’re likely reading this because you want to whip up some delicious chicken—you’re in luck! This method is quick. Grilling chicken on the stove takes less time than you think, and it’s practically foolproof.
Plus, the flavors you can build are endless. If you’ve ever sunk your teeth into a juicy, well-seasoned breast, you know the satisfaction that comes with it.
The Ingredients You’ll Need
Before diving into the grilling process, let’s gather the essentials. Don’t worry—these are mostly staples that you probably have in your pantry.
4 boneless, skinless chicken breasts (about 1 pound total): Chicken breasts are lean and cook up beautifully.
Salt and freshly ground black pepper, to taste: A seasoning essential, allowing all flavors to shine.
3 tablespoons vegetable oil or canola oil: For that perfect sear.
Cooking spray: A little insurance against sticking.
2 tablespoons unsalted butter: This adds richness and moisture.
½ teaspoon garlic powder: Because who doesn’t love garlic?
½ teaspoon onion powder: It brings out the umami.
½ teaspoon smoked or sweet paprika: Adds color and a little smokiness.
½ teaspoon dried basil: For an Italian touch.
½ teaspoon dried oregano (optional): A classic herb that pairs well with chicken.
½ teaspoon lemon zest (optional): For a refreshing hint.

Step by step instructions
Step 1: Prepare the Chicken
Start by patting the chicken breasts dry. It’s important! A dry surface will help form that nice crust. Once you’ve dried them, season both sides generously with salt and black pepper. You can really let loose. Remember, chicken absorbs flavors well.
Step 2: Marinate (Optional)
If you have a few extra minutes, marinating is a great way to enhance flavor. You can use olive oil, lemon juice, and your choice of herbs for a quick dip before cooking. Even a 30-minute soak makes a difference!
Step 3: Heat the Pan
Grab a large skillet and heat over medium-high heat. Once it’s hot, add the vegetable or canola oil. Wait until it shimmers. This indicates that the oil is ready for action.
Step 4: Add Chicken Breasts
Carefully place the chicken breasts in the pan. You should hear that satisfying sizzle. Avoid overcrowding—give them room to breathe. If they’re clumped together, they won’t cook evenly.
Step 5: Sear the Chicken
Cook the chicken for about 6-7 minutes on one side. Here’s where you want to watch for that golden-brown crust. Don’t flip too soon! Once you’ve achieved that, flip each breast over.
Step 6: Add Butter and Seasonings
After flipping, toss in the butter. As it melts, use a spoon to baste the chicken with the buttery goodness. Then, sprinkle the garlic powder, onion powder, paprika, and any other herbs you’re using. Trust me, this step is what takes your dish from bland to grand.
Step 7: Cook Until Done
Cook for an additional 5-7 minutes on the other side or until the chicken’s internal temperature reaches 165°F (75°C). A meat thermometer is your best friend here!
Step 8: Rest the Chicken
Once cooked, take the chicken off the heat and let it rest for about 5 minutes. This helps the juices redistribute, ensuring every bite is moist and flavorful.
Tips & Tricks
Use a meat mallet: Pound chicken breasts to an even thickness. It cooks evenly and prevents dryness.
Let your chicken come to room temperature: About 20-30 minutes out of the fridge helps in cooking evenly.
Don’t skip the resting: Letting it rest after cooking is essential for juicy chicken.
Sear, don’t simmer: Make sure the pan is hot enough to sear. It’s the key to good texture.
Experiment with marinades: Try various flavors from Asian to BBQ to find what you love best.

Can I Store Grilled Chicken?
Absolutely! Store tightly sealed in the refrigerator for up to 3-4 days.
Just ensure it cools to room temperature before sealing it up.
What Can I Serve with Grilled Chicken?
The possibilities are endless. Here are a few ideas to elevate your meal:
Grilled vegetables: Zucchini, bell peppers, and asparagus are excellent options.
Rice pilaf: A flavorful bed for your chicken.
Mixed salad: Greens topped with nuts, cheese, or croutons.
Pasta: Who doesn’t love a hearty pasta alongside perfectly grilled chicken?
Potato wedges: Crispy potatoes make any meal complete.
Variations to Try
Looking to mix things up? Here are five variations you can experiment with:
Lemon-Herb Chicken: Substitute lemon zest and add fresh thyme and rosemary for a bright and herby flavor.
BBQ Glazed Chicken: Brush your favorite barbecue sauce during the last few minutes of cooking for sweetness and smoke.
Spicy Cajun Chicken: Use Cajun seasoning instead of the garlic and onion powders for a kick!
Mediterranean Chicken: Toss in olive oil, dried oregano, and capers for a Mediterranean twist.
Honey Mustard Chicken: Marinate in a mix of honey and mustard for a sweet and tangy finish.
Equipment
- Large skillet
Ingredients
- 4 boneless skinless chicken breasts (1 pound total)
- Salt and freshly ground black pepper to taste
- 3 tablespoons vegetable oil or canola oil divided
- Cooking spray
- 2 tablespoons unsalted butter divided
- ½ teaspoon garlic powder
- ½ teaspoon onion powder
- ½ teaspoon smoked or sweet paprika
- ½ teaspoon dried basil
- ½ teaspoon dried oregano optional, for an herby touch
- ½ teaspoon lemon zest optional, for a hint of brightness
Instructions
Step 1: Prepare the Chicken
- Start by patting the chicken breasts dry. It’s important! A dry surface will help form that nice crust. Once you’ve dried them, season both sides generously with salt and black pepper. You can really let loose. Remember, chicken absorbs flavors well.
Step 2: Marinate (Optional)
- If you have a few extra minutes, marinating is a great way to enhance flavor. You can use olive oil, lemon juice, and your choice of herbs for a quick dip before cooking. Even a 30-minute soak makes a difference!
Step 3: Heat the Pan
- Grab a large skillet and heat over medium-high heat. Once it’s hot, add the vegetable or canola oil. Wait until it shimmers. This indicates that the oil is ready for action.
Step 4: Add Chicken Breasts
- Carefully place the chicken breasts in the pan. You should hear that satisfying sizzle. Avoid overcrowding—give them room to breathe. If they’re clumped together, they won’t cook evenly.
Step 5: Sear the Chicken
- Cook the chicken for about 6-7 minutes on one side. Here’s where you want to watch for that golden-brown crust. Don’t flip too soon! Once you’ve achieved that, flip each breast over.
Step 6: Add Butter and Seasonings
- After flipping, toss in the butter. As it melts, use a spoon to baste the chicken with the buttery goodness. Then, sprinkle the garlic powder, onion powder, paprika, and any other herbs you’re using. Trust me, this step is what takes your dish from bland to grand.
Step 7: Cook Until Done
- Cook for an additional 5-7 minutes on the other side or until the chicken’s internal temperature reaches 165°F (75°C). A meat thermometer is your best friend here!
Step 8: Rest the Chicken
- Once cooked, take the chicken off the heat and let it rest for about 5 minutes. This helps the juices redistribute, ensuring every bite is moist and flavorful.
Notes
Nutrition
Frequently Asked Questions
Can I use frozen chicken breasts?
Yes, but it’s best to thaw them in the refrigerator overnight before cooking. Frozen chicken directly in the pan may lead to uneven cooking, so patience is key!
How do I know when the chicken is done?
Use an instant-read meat thermometer. It should read 165°F (75°C) at the thickest part of the breast for safety.
Can I grill chicken without oil?
While it’s possible, oil helps achieve a better sear and prevents sticking. If you’re trying to reduce calories, use a non-stick spray instead.
How do I make my chicken less dry?
Choose medium-high heat for a quick sear, establish an even thickness by pounding the breasts, and don’t skip the resting step!
What’s the best way to flavor my chicken?
Consider marinating chicken for at least 30 minutes. You can also season generously with spices and herbs before grilling.
Conclusion
Grilling chicken breast on the stove is a simple way to bring out fantastic flavors without the hassle of outdoor equipment. With just a few ingredients and straightforward steps, you can create a dish that’s juicy, tender, and so satisfying.
Whether for a quick weeknight dinner or a weekend gathering, this method will ensure you and your guests leave happy. So, fire up that skillet and let’s get cooking! You’re on your way to grilling perfection. Happy cooking!
You’ll also like these latest recipes!

Rebecca Novak is a trained chef with over 10 years of experience in the food industry. She has worked in both fine dining and casual Hungarian restaurants and specializes in creating dishes using fresh, seasonal ingredients. She also loves exploring different cuisines worldwide, which allows her to bring unique flavors and ideas to the recipes she creates for Hungarianchef.com. Read more